The following provides a step by step guide to configuring the ReRum PMS to work with Xero.com:
1- Once you have your Xero.com account created you should provide res:harmonics with a login so they can create an API key
2- You need to be a Xero administrator to perform this configuration
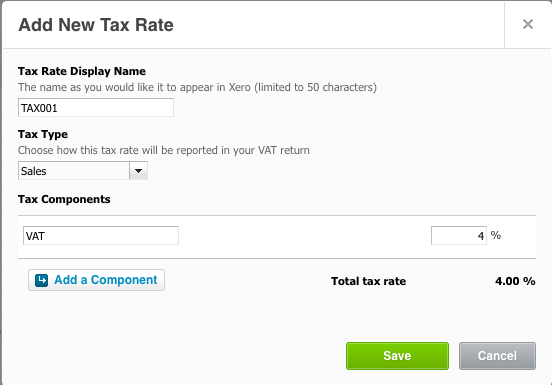
3- In Xero add a new Tax Rate to support 4% Tax rate used for stays over 28 nights. Tax rates can be found in Settings - General Settings - Tax Rates. Copy the below exactly & click save.
4- Create a chart of accounts entry in Xero for each of your Sales products in ReRum PMS.
(Note: Only input data for Sale products only. Items which are Purchases have not been set up yet in Xero but will be in the future.)
You can find your products in ReRum PMS in Admin - Finance - Products.
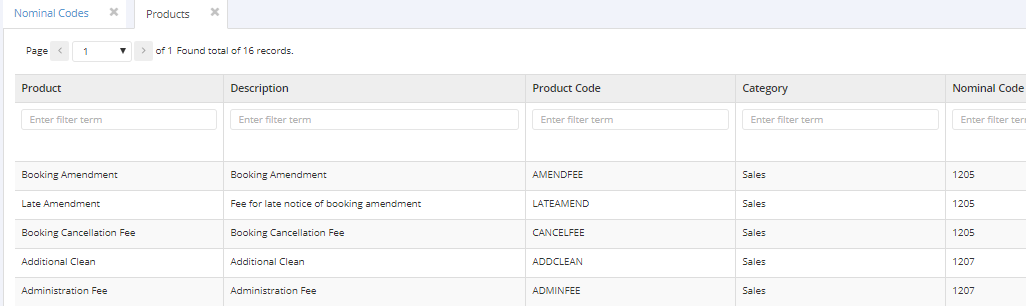
You then find the chart of accounts in Xero. This is found in Settings > Chart of accounts > Click Add account. Repeat this for each product you expect to use on Sales Invoices in ReRum PMS.
(Note: You will need to use one nominal code along with a generic unique name to cover all aspects for that code which may be listed more than once in ReRum.)
.png?version=1&modificationDate=1507907472610&cacheVersion=1&api=v2&width=697&height=544)
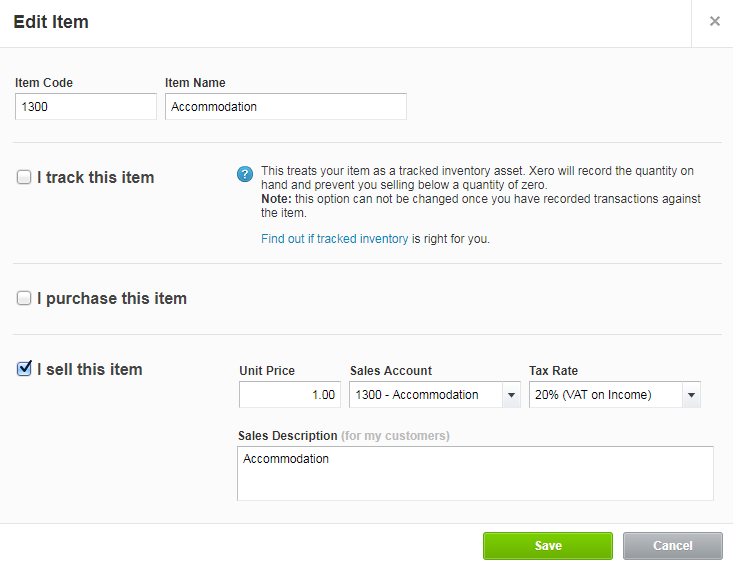
5- ReRum PMS uses Xero inventory items for it's invoice line items. Therefore you need to create these inventory items. Inventory items are added in Xero via Accounts > Inventory > New Item.
Create an inventory item to match your products.
Note: Create an inventory item for each Product listed in ReRum (can have the same sales account)
Note: Item Codes + Item Name needs to match the nominal code on ReRum, this is creates a link between Xero and ReRum, however a nominal code can only be used once per inventory item.
6- ReRum needs to be configured with the data from Xero and to do this is to click on Admin > System Configuration > Xero. This will allow you to make ReRum and Xero able to interact correctly.
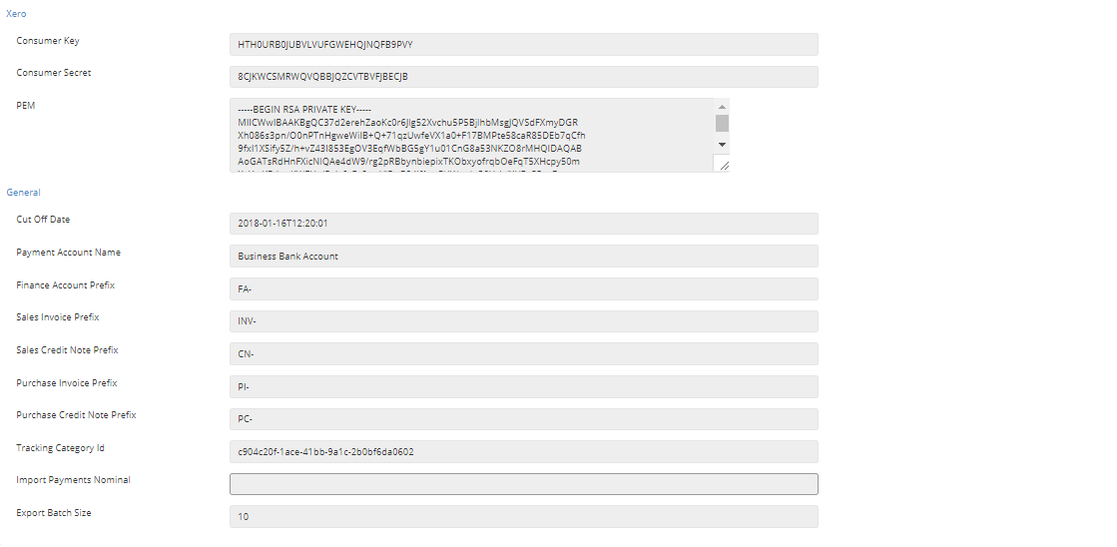
This Infomation should match the following set of data within Xero. Below is a breakdown of each field which will explain how to gather this infomation and create a link between the two systems. Note: Each Prefix needs to end with a -
Cut Off Date -
This is the date that you start using invoices with Xero. The layout of the date will be displayed in the box but it should follow
yyyy-mm-ddThh:mm:ss. An example of this is 2017-11-15T13:01:01.
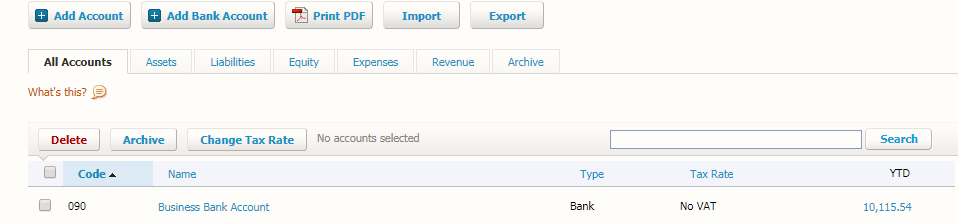
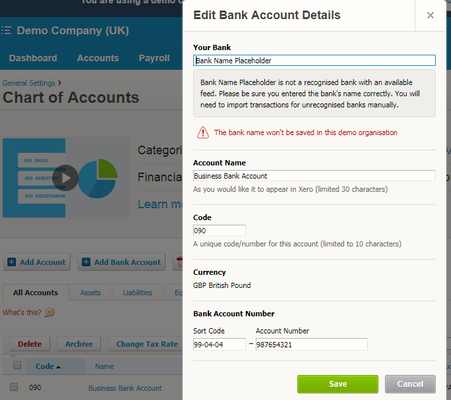
Payment Account Name -
This needs to match the bank account name in Xero. To access this page simply click on Settings > Chart Of Accounts.
Finance Account Prefix -
This should be FA- within Xero therefore just copy this into the allocated text field within ReRum.
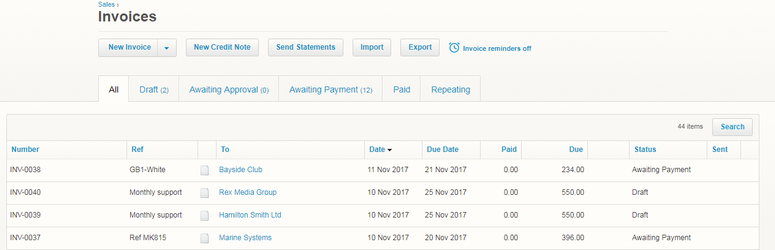
Invoice Prefix -
This needs to match with the Prefix in the Number Column. To access this page click on Account > Sales > Click 'see all'. As you can see the "INV" is used for all invoices. Copy this into the Field.
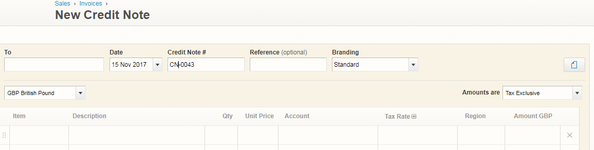
Credit Note Prefix -
This needs to match with the Credit Note Prefix in Xero. When creating a Credit Note, it should automatically generate a Credit Note number. The Prefix should be "CN". Copy this into the Field.
Consumer Key, Consumer Secret and PEM -
This will be provided by res:harmonics. Contact res:harmonics with a login and we will provide this data for each user to input.
Import Payment Nominal -
This needs to match the code in the Business Bank Account. Go to Setting on Xero > Chart Of Accounts > Open the Business Bank Account and copy the code into this field.
Export Batch Size -
Insert 10 into Batch Size.
Click on Update System Configuration.
This is all the Xero side configuration that is required to get started.