How to Create a Role
Video - How to Create a Role
Creating a role allows the allocation of a role, such as plumber, electrician, cleaner, etc. of a specific supplier company to a Building or a Unit. This then gives the user a clear overview of which supplier company to use for a specific job, Building or Unit.
Creating a Role?
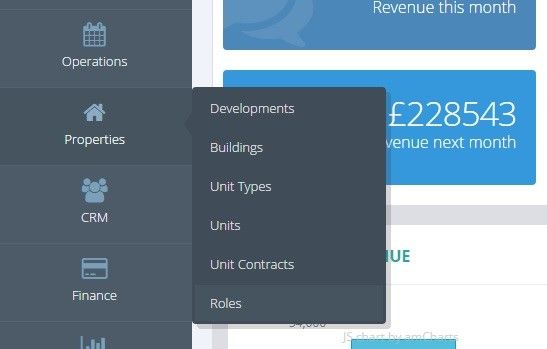
1 - Go to Properties → Roles.
2 - Select Add Role to add a new Role.

3 - Enter the name of the Role and description if required, and save the Role.

4 - You will then see all the Roles you have added so far in the list of Roles.
You can update the Roles at a later stage by selecting the role, editing and saving. The changes will be propagated to the Buildings and Units.

Associating a Role to a Building
1 - You can associate a Company to a Role for a specific Building. In order to do this, you need to have the Role set up (see above), the Company set up (see Create a New Company) and you will need to have your Building added (see Adding a Building).
Open your Building and go to the Roles tab. Select the Add New Role button at the top right.

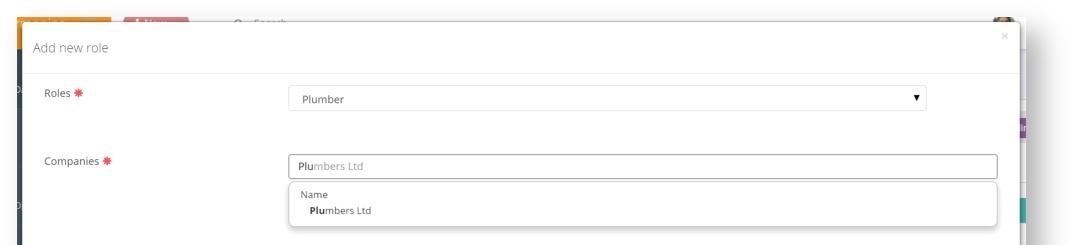
2 - Select the Role you wish to assign - you will see the Roles you previously created.

3 - Type in the name of the Company you wish to associate to this Role. The field is a type ahead so you will just need to put in at least 3 characters before being given some options. Then save!
You will now see the Role and its associated Company in the list.

Associating a Role to a Unit
1 - You can associate a Company to a Role for a specific Unit. In order to do this, you need to have the Role set up (see above), the Company set up (see Create a New Company) and you will need to have your Unit created (see Adding a Unit).
Open your Unit and go to the Roles tab. Select the Add New Role button at the top right.

2 - Select the Role you wish to assign - you will see the Roles you previously created.
3 - Type in the name of Company you wish to associate to this Role. The field is a type ahead so you will just need to put in at least 3 characters before being given some options. Then save!
4 - You will now see the Role and its associated Company in the list.